If you are looking for my Festival of Lights Blog Hop post and Video Blog Hop post - please scroll down!
Today I have my featured post from the Cuttlebug Challenge blog!


Cassie here this morning to kick off the projects for today. Several of the Senior Design Team will be sharing projects centered around the theme of
Santa's Sweet Shoppe.
One of the traditional symbols surrounding the Christmas season is the Gingerbread House. I love the smell of gingerbread - in cookie or cake form! I don't remember ever decorating gingerbread houses as a child but my mother-in-law has done it with her grandkids for as long as I can remember. My little man (not quite 2 last year) got to "help" last Christmas --- which was eating more than anything! One thing I've always been amazed at is the willingness of people to put so much effort into something that is just thrown away after the holiday. But a gingerbread house out of paper would last from year to year!

Supplies:
house form/box/templatedecorative papers
Cuttlebug & embossing folders (Victoria, Snowflake)
craft knife
strong adhesive
liquid adhesive (Crystal Effects)
glitter (Perfect fX in Sparkling Champagne)
ink
trims - lace, buttons, pearls

I started with a box I found in the shape of a gingerbread house. It contained cookie cutters but I bought it for the form!

After opening the box at the top, I peeled off the slick printed layer of the house. I wanted a good surface for my adhesive to adhere to and also didn't want any of the printing to potentially show. After that, I used an inkpad to add color to all the edges that matched my base paper.

I cut my paper into strips and embossed them using my Cuttlebug and embossing folders. The roof paper was sanded to reveal the white core of the paper. The siding was lightly rubbed with the ink pad to bring out the embossing. The edges were also inked on the side pieces.

Then came the fun part - adding in all the details! I used a third patterned paper for the door and windows, using a pen to add some detail. Instead of traditional "candy", I used "candy" that crafters find "yummy"! Buttons along the base, pearls on the roof.

I used Crystal Effects along the edges of the sides and the windows/doors and then sprinkled it with glitter - some Perfect fX flakes I have from when I first started stamping.
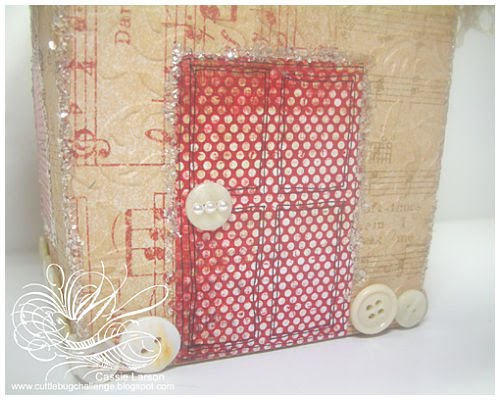
And a final closeup shot - can you see the embossing on the sides? This was really easy to make since I already had a form to use. It was just a matter of cutting, embossing, adhering and decorating! One thing I wish I'd done was go over *all* my edges on the room instead of just the two ends. But I'll just remember that for the next one!

I hope you enjoyed my project today!
Have a beautiful day!! ~Cassie
10 comments:
How creative are you??? I love this gorgeous gingerbread house!
Adorable house! Love the buttons and all the sparkle.
Cassie -
Love this! I can see making a whole village in different sizes.
Elaine Allen
Too adorable, love the button 'candy' and pearls on the snowflake roof!
Adorable gingerbread house!!Too funny that you bought the cookie cutters for the box~ I have done the same thing myself :)
This is `stunning` Cassie love how you used the buttons!!!TFI:)x
Great house....loved the lace and buttons!
wow! I didn't realize this cartridge had a house on it. What fun!
Pamela
SUPER LOVE IT. How cute!
Cassie Girl,
Been way way to long since I have been by and I am so sorry about that, but these houses oh my word girly I love love love them!!! I so wanted to ask you to be on The Rusty Pickle Team, but somthing told me you probably had a little too much on your plate at the momment to take on a whole new team, but if you ever think you might want to let me know!!!
Heather
Post a Comment